Magic Blarney Stones Project

Standard

According to legend The Blarney Stone, when kissed, can impart the gift of eloquence and persuasion.  It lies within the confines of Blarney Castle in Ireland, built in 1446 by Dermot McCarthy

I started building these little beauties after being inspired by just thinking about magical stones through out history.  Authurian lore tells of Arthur pulling his sword Excaliber from a stone. Crystals and gems contain magical and mystical properties. The Blarney Stone is rumored to be Jacobs Pillow, the stone the father of the Israelites used as a place to rest his head while sleeping as he fled from his brother Esau. Jacob had a vision of a great staircase as he dreamt. The next day Jacob consecrated the stone to God.

Jacob’s Pillow was brought to Ireland by Jeremiah the Prophet, where it become Lia Fail or the Fatal Stone, used as a kind of sorting stone for Irish kings.

Other legends surround the stone, whose power and prophetic abilities were brought to the attention of The MacCarthy’s by a witch who was saved from drowning.

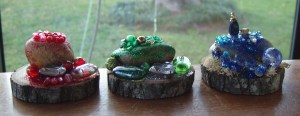
My own little Blarney Stones are river rocks mounted on rounds of cedar wood. Glitter, beads and magical elements are added to the stones to create an enchanting, unique Blarney of my own design.
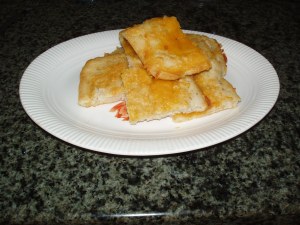


The Frugal Musician makes Focaccia

Standard

I was looking for a very quick bread recipe to accompany a casserole and I remembered this ultra easy focaccia. Incredibly fast and delicious.

Fast Focaccia

1 cup water

2 cups all purpose flour

2 tsp baking powder

1 tsp salt

1 tblsp olive oil (I didn’t have olive oil so I substituted Kraft Olive Oil with Feta bottled salad dressing)

1 tablespoon melted butter (optional)

1/2 cup or less of any kind of shredded cheese. I used sharp cheddar.

Preheat oven to 425 degrees. Mix all ingredients together. Pour into a greased 9×13 baking dish ( I used a glass dish). Bake for 20 minutes. Remove from oven and pour melted butter over top and add cheese. Bake five more minutes.

Terrific results!

New Year’s Candles- a craft project

Standard

I had wanted to try my hand at candlemaking for some time. As with all my crafting notions, I resolved to experiment with a minimal budget. When I choose a craft project, it must meet certain criteria. I steer away from plastic. I try to purchase recycled supplies, usually from a thrift mart. I also scout around the house for what I need first before visiting a thrift mart or craft store. The large chain stores are my last option for supplies as most everything is made in China and is plastic and definitely not eco-friendly.

It’s New Years Eve and the candlemaking project seemed appropriate. The element of fire represents energy and passion and also denotes clearing the old to make way for the new. Candlemaking seemed to be the perfect craft to usher in the new year.

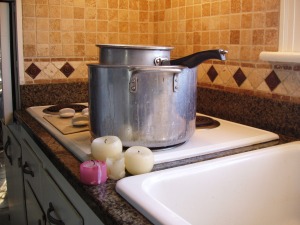
I remembered I had old pots in the garden shed that belonged to Boyfriend’s grandma. When she passed, her sons cleaned out her kitchen and wisely, Boyfriend called in the midst of it and said, “Do you want anything of Bah’s?” and I said, “Yes! Her pots and pans and cookware!” Men could not know the value of seasoned iron skillets and vintage Corning Ware. I was thrilled when Bah’s cook pieces came home with Boyfriend, along with her beloved piano.  The skillets and Corning Ware were cleaned and put to immediate use, but the aluminum pieces were pocked and clearly beyond a cooking purpose. So they found a home in the garden shed as storage for seed packets and plant ties.

Bah's old aluminum pots and candle stumpsInstead of purchasing actual candlemaking supplies, I knew I had a plethora of old candle stumps in my cabinet and resolved to give them a new life for the new year. I started by creating a double boiler, one big pot of water, with the small aluminum sauce pan floating on top to melt the old candles. This worked perfectly and soon the stumps were melting along with some beeswax I had used for a craft project earlier in the year. The beeswax gave the melting candles a divine scent! Candle stumps and beeswax in double boilerA quick online tutorial instructed me to pluck out the wicking and sustainers from the melting wax. After I got an idea of what a sustainer was, I fashioned my own from old hair pins. The wicking was attached to the sustainers.Round and angle sustainers (repurposed)

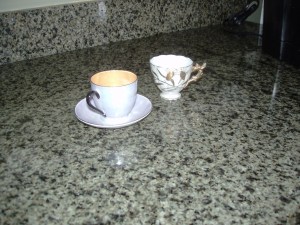
I dipped the wicking and sustainers into the melted wax and attached them via the hot wax to the bottom of my new candle receptacles.  I tied the wicking to a bamboo skewer to keep the wicking straight. I used a seashell, an empty blue tin, and two porcelain Victoria Czechoslovakian Demitasse cups I had picked up at the thrift mart for less than a dollar each for my new candles. I was lucky to find the saucer for the Lavender Lustre cup. The other cup had no saucer.

Victoria Czechoslovakian porcelain Demitasse Cups

I poured hot melted candle wax into my new receptacles and allowed the new candles to dry for an hour.

Bamboo Skewers hold wicking in place

After the candles dried, I unwound the excess wicking from around the skewer and viola! New candles from repurposed, recycled materials.

Victoria porcelain Demitasse Teacup CandlesSea Shell and Blue Tin Candles

I’m really pleased with my new candles.
Out with the old!
In with the new!
Happy New Year to you!